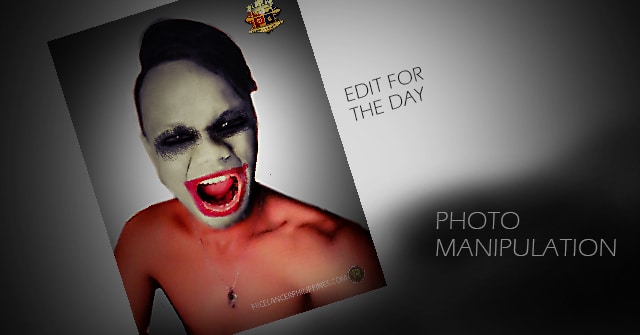
Joker facelift tutorial – Photo Manipulation – Go Edit Pilipinas One
Here’s another photo editing request! from Go Edit Pilipinas! He wants to have a face lift to look like his idol, JOKER. Though at first, I didn’t know what he was talking about is the Joker in Suicide Squad, this is actually updated. So! That’s what he want, that’s what he shall get. Here’s my Joker facelift tutorial.
Step 1: Remove background

Ok, obviously the background is very distracting. It can be easily removed by the Pen Tool or a Hard Edged Eraser. Just erase the background, following the outline of head and body
Step 2: Colorize his face and body into gray.
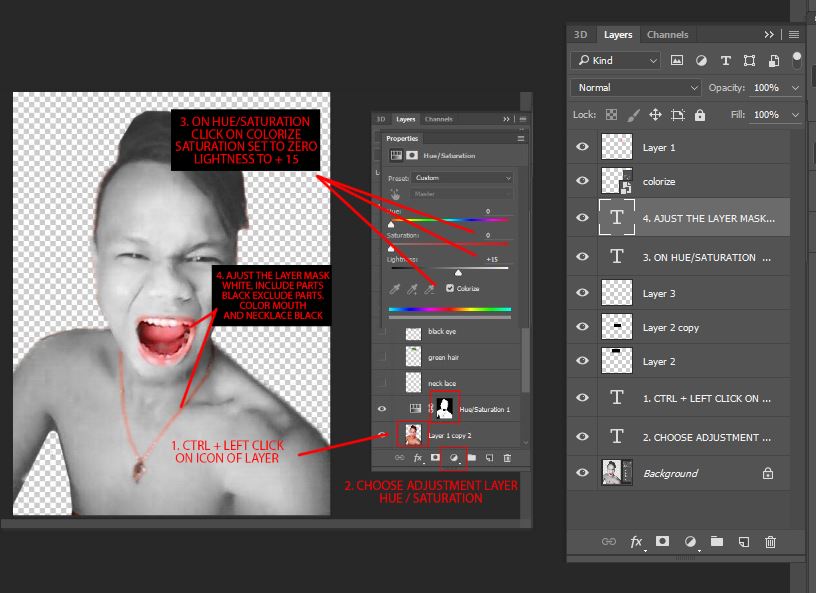
Ok, there are several things to do, to color his whole body gray. First, Hold CTRL then Click on the Icon of the layer, this will select only the part of his body not including the whole background. Second, Click on the Adjustment layer, and Select Hue/Saturation. This will create an adjustment layer with a Hue/Saturation option and a Layer mask in the shape of his body. Adjust the color by setting the following: Click on Colorize, Saturation to zero, Lightness to +15. This will make him all Gray. Now deselect some parts out of the Hue/Saturation, buy painting black on the Layer mask. The mouth and necklace is colored black on the Adjustment layer so it will not be
Step 3: Colorize hair, mouth and necklace
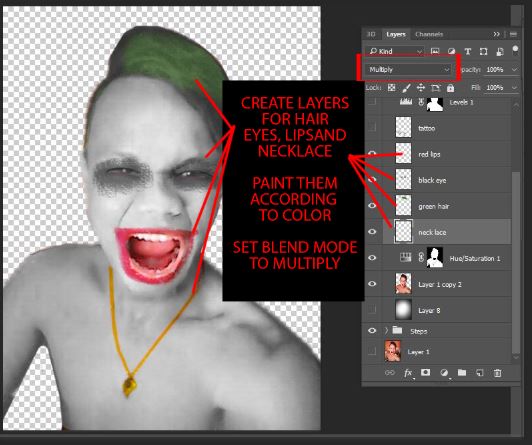
Ok, since his eyes and his clown lips are painted, you add this by just painting with brush. Add separate layers for each, so you can adjust separately for each. Set the blending mode to Multiply to have the natural color effect
Step 4: Add a background
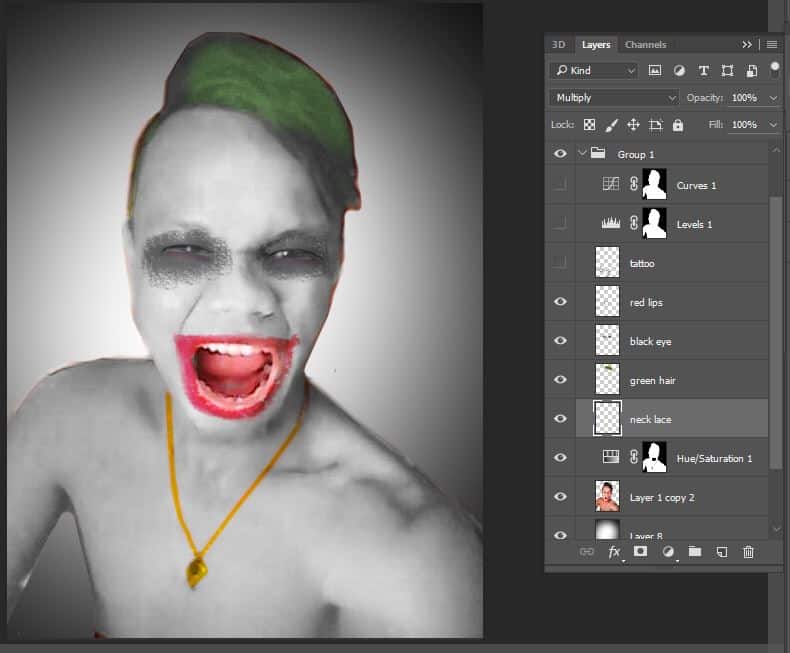
The background can anything. This time I’ll just use a black and white Radial Gradient, to have that Vignette effect
Step 5: Add Tattoos
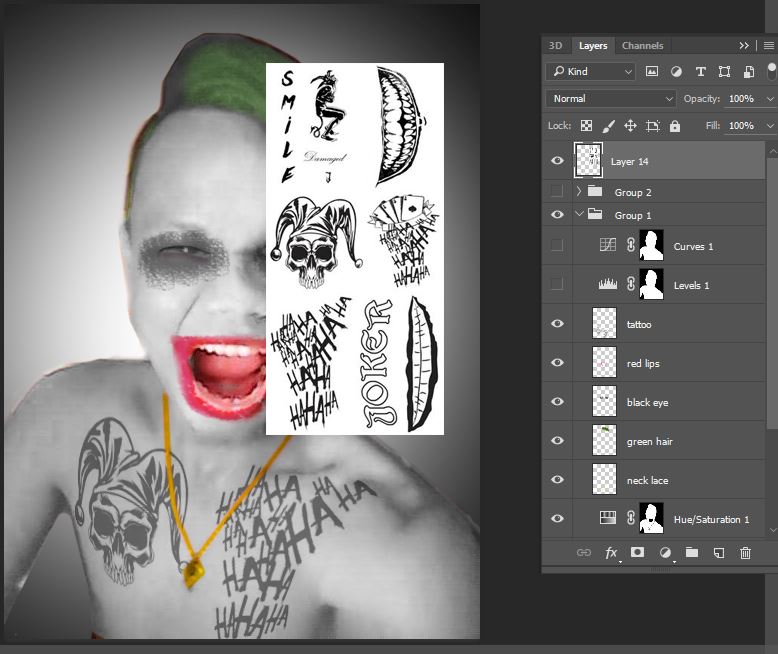
Search the web for “Joker Suicide Squad Tattoos”. This one is what I got. You just simply cut them out, place the where they should be. Adjust them by Warp to follow the perspective effect.
Step 6: Apply Color Corrections

Of course, the edit is not complete without the color corrections. Again, for non-destructive editing, put some Select Adjustment layers for Level and Curves. Adjust parameters, in such a way that the shadows are dark enough to contrast with the other lighter area of his body
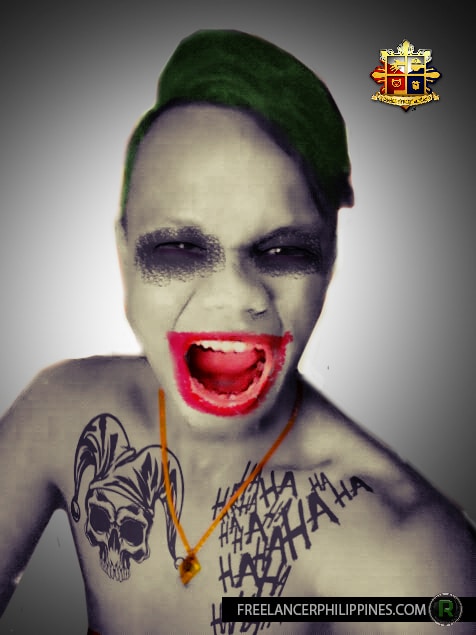
Here’s the final result, with some minor tweaking on color and also the logos for GoEditPhilipinasOne, and my trade mark logo. Hope this would give you some idea on photo manipulation. This is just a fast edit, for fun and illustration purposes. If you have comments or reaction please let us know. If you like this post, please share! And Happy Photo manipulating!
